Showing posts with label tutorials. Show all posts

10.06.2011

Guest Post


Today I'm showing a few variations of pintucks over at Elsie Marley. Here's a preview of one of my favorite new little ideas. I'm thinking I'll have to try this again during next weeks KCWC.

I'm really excited to see what everyone out there in Blogland makes for the challenge week.  I always find great new ideas that I want to try and this year I'll be able to keep things organized by Pinning them. Yay Pinterest!

8.19.2011

Summer Sunset Dress


In case you missed it last month on Luvinthemommyhood I'm re-posting this tutorial.

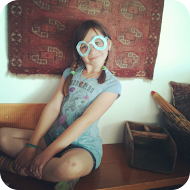
Yes, that's a little shirring you see there on the shoulder. I thought I'd join in on all the elastic thread fun. I made a few of these for Luca, but I really liked the way they turned out so I may try making some for myself. I'm not much of a one shoulder gal, but don't worry... I'll show you how cute this top looks with two shoulders.

First of all the fabric you choose can be any weight knit fabric. I tried this out with everything from a thinner jersey to a medium interlock. If you are new to knits, interlock can be easier to sew with than jersey which can curl at the edges once cut. I use a rib knit for the neck and arm binding, but you can use other knit fabric for your binding. 


Let's get started with your pattern. To make this tank dress/top all you need is an existing tank that fits. I chose a tank top that fits Luca pretty snug. It's more of an undershirt. The reason I have the tank hanging off the edge of the paper is because I wanted to get the top part right before I wasted paper on the length. Make sense? Sorry 'bout that. 

The first top that I made from this tracing seemed to go a tad too low under the arm and looked like there was going to be a game of peek-a-boo with Luca's front, so you can see I raised the left side up a bit and added a bit of a swoop.


So here is the version of the dress that the "swoop" was too low so I had to add a spaghetti strap. It turns out this is by far her favorite dress and she's been wearing it a lot! To make a skinny strap from knit fabric you can visit my previous tutorial that I did for the Versus Mag on making skinny straps from knit fabric.

I played around with different widths of the straps and you may want to go wider than the tank you are tracing because the shirring takes out a lot of width. After tracing your pattern you can either make this into a tank top or dress. When making a dress you want to create an A-line from the armpit to the length you want. On the yellow dress I went a little narrower and longer. The floral dress with the tie is a bit wider (not much) and I decided to make the bottom hemline with a curve. 


 I found that five lines of shirring works pretty good for this style. Mark your lines below the seam allowance and evenly spaced after that. I use a water soluble pen to mark my lines. Using a ball point needle stitch your shirring lines. The right photo shows the shirring once it is sewn. This is actually without spraying any water, which often causes the shirring to gather up real nice and even. I found that most knit fabrics that I used pretty much looked good straight from the machine. I have since washed these dresses a few times and they hold up great. 

If you haven't sewn with elastic thread before, don't be intimidated. I hand wind my bobbin and so far so good. Shannon has been making some killer things using elastic thread and she has some good tips. 

Once you have shirred the shoulder of the front of one panel, with right sides together stitch shoulder seam closed with either a serger or zig zag stitch. 

{here is the shirring on a thinner jersey print knit fabric}

Next you will attach your neck and arm binding. This really isn't as hard as it may seem. It's really up to you what width you cut your binding. I usually use a binding between 1 1/2-2" wide of rib knit. Cutting across the grain or stretch you want to make strips longer than the armhole circumference and neckline circumference. Extra is fine because you will cut the excess off later. 


With right side of rib knit facing wrong side of fabric, serge binding onto neckline. Photo shows armhole binding completed and neckline binding just serged into place. I usually don't press my binding in the next step, but I tried it to see if this may help for someone that has not made a knit binding before.  It actually worked nicely and I would recommend this if it is your first time working with knits. 

Press or fold binding over double toward right side of fabric and pin in place. To stitch the binding in place you can use either a twin needle (my new favorite thing) or just a regular ball point needle that you have been using for the garment.  If using a single needle make sure to use a long stitch. I use between a 2.8-3.0 on my machine depending on the knit. I test a scrap first to see how it looks.


Here you can see that I did not press the binding, but just double folded it and used pins. You can kind of see from the photo on the left that this is going to be the two shoulder tank.

If making the one shoulder tank at this point you want your armhole and neckline (which is also kind of the armhole) finished with binding. If making a two shoulder tank you want to just finish the armholes and not the neckline yet. 


For a single shoulder tank all you need to do is trim the excess length of binding past the seam allowances and with right sides together, serge or zig zag both side seams closed. 

Hem tank dress or leave it unfinished. That's one great thing about knit fabric! No raveling! The floral dress has an curved hem line which can be tricky to avoid puckering unless you make the edge very narrow. I serged the bottom and folded the hemline up just the width of the serge line and top stitched with single needle and a wide stitch length. This almost becomes a narrow roll edge. On the yellow dress I used a twin needle and a heftier hemline.

So how about making this cute dress with two shoulders?

{please ignore Little Dude to the left}

The only difference with the two shoulder tank is that you will shir the two front panels of the tank top pattern you traced. Next, with right sides together stitch closed shoulder seams. Next,attach armhole binding as shown above. Next is where I do things a little different. Without finishing the neckline binding, I stitch closed the side seams (right sides together). Leave tank wrong side out. 


 Measure the circumference of your neckline and take away about 1/3' - 1/2" depending on the stretch of the binding. Right sides together stitch neck binding closed into a circle. You'll have a headband looking thing.

With right sides of rib binding to wrong side of fabric pin binding into place. There should be a little bit of stretching of the neckline binding, not the neckline of the tank.

Stitch or serge the binding into place stretching the binding evenly as it is being attached to the garment. It may seem awkward, but you want to stretch the rib knit while not stretching the garment body fabric. Like I said before, knit fabric is pretty forgiving and you will surprised at how this comes together, especially after a trip to the laundry.

Finish neckline binding as you did for the armhole above. For the hemline I finished the heart dress the same as the floral.


I love the possibilities with this dress. Did you see the racer back tank that Anna from Noodlehead did last week? I'm thinking this could be pretty cute as a shirred racerback tank dress! Let me know if you give it a try or if you have any questions about sewing with knits. I am certainly no expert, but I kind of dove blindly into the knit fabric arena (no pun intended to those of you who already read my blog you know that I have a blind son and I rarely spare the jokes) and you know what? I am loving it... um, both sewing with knits and having a blind child!


7.25.2011

Summer Sunset Dress


Today I'm guest posting over at Luvinthemommyhood for Sewing with Knits Mondays! To see the tutorial for this dress go on over for a peek.

4.27.2011


Come see what I have to share on Luvinthemommyhood 


I'm duking it out in the Versus ring


3.13.2011

Reversible LEGO Playtable


I'm so happy to be a part of Celebrate the Boy this year. In terms of Blogland it is my favorite time of year. This project is actually something that the entire family will enjoy. I've had this idea in my mind for quite a while and since we are going to Legoland for Spring Break next month, this is the perfect project for the Romeo kids. I decided since this is a Celebrate the Boy project that I needed to get some of the big boys around here involved, so Opa (my dad) came over one afternoon to work on this project with me.


My kids love to play low to the ground so I created a table that could be used with floor pillows or just hanging out on their knees. You can make a table with longer legs if you want to use chairs.

CLICK HERE TO GO TO INSTRUCTIONS


I made the Lego bag using this tutorial that was featured earlier in celebrate the Boy.


11.10.2010

Mix n Match and Modify {a mini tute}

I have had a couple of readers ask me if I thought the Easy Fit Pants that I make so often look a little girly with the extra wide leg. Well, I do think they look a little feminine. That clearly hasn't stopped me from making a ton of these pants (as seen here, here, here, here, and here) for Vinny. I have to say that with his blond hair (uncut), blue eyes and dimples he gets mistaken for a girl more often when wearing any of the above listed pants. I don't really care about the mix up but Chef did ask me why I kept making the poor boy wear girl pants. 

Obviously a simple remedy is to taper the leg a bit but I got to thinking about different ways of changing up a wide leg pant. I'm not re-inventing the wheel here guys but I thought you might like to see a few ways to change up a wide leg pull on pant for girls and boys.

 {This is a cute capri length that screams Easter to me}

 {Contrast fabric is a fun way to change things up a bit}

 So let's get started...


These instructions are for the tab set in the side seam.
 I cut two sets of tabs by cutting a rectangle (about 2" X 3") first and then rounding the edges. I used a thread spool as my template for the rounded edges but you can just eyeball it.
With right sides together stitch two pieces together leaving one short end open for turning. Turn right side out and press. I stitched buttonholes on these tabs before inserting them into the side seam, but as you'll see later I realized that buttonholes are just a nasty extra step that is needless for this application. So by all means skip this step.

Place tab on side seam. I made my tabs too long so I have the tab hang over the raw edge by 3/4". I measured where the hemline would be and placed the tab about 1 1/2" up from where the finished hemline of the pant will be. This was totally eyeballed. Stitch side seam closed as usual. 

{I also edge stitched the side seam for a cleaner look}


After hemming the pants and finishing the waistband I stitched in 5 rows of elastic thread to gather the extra width of these wide pants in just a bit. If you haven't used elastic thread yet it's quite fun and easy. Just hand wind a bobbin with the elastic thread. There's really no trick to sewing with elastic thread. It puckers up quite nicely with the steam from your iron.

Here's the blue pant without buttonholes. Just as cute and easier. I totally ruined this pant by not only getting red ink on the front panel but I also made two left legs and didn't realize until the pant was finished. When stitching in your side seam tabs make sure to keep a left and right leg.

If making a pant like the tweed pictured at the top of this post...

I just made a tuck (again eyeballing it!), pinned it in place (centering tab) and topstitched the tab. I then stitched the button into place. No buttonholes... all fakey fakey.


For one of the pant legs I placed the tab about 1 1/2" up from the hemline. On the other leg I placed the tab along the bottom of the pant. I like them both and they are equally cute. I can't wait to try this out for a girl pant.

The waistband of this pant is just added length and a casing sewn where the regular waistband casing would be. This is actually my very first elastic casing for a waistband (I've done it before on gathered pockets). I usually sew elastic waistbands differently (another tutorial one day). I like the high waist detail on this pant and it looks very cute with a onesie. I'm thinking about making it with a little less added fabric for a boy pant and adding old fashioned suspenders. Not sure yet if it will work. Maybe in a corduroy or tweed.

So that's it for some more ideas on embellishing pants. Of course you can always add ruffles to the bottom or this fun pant that I'll have to try next.

10.11.2010

A Tutorial and a Giveaway!

Giveaway Closed
Hello everyone who has come over from Sewmamasew. Everyone else, of course a great welcome to you too! I hope you enjoy the tutorial I have for this great baby carrier, the Pea Pod, posted on the sewmamasew blog!

(I'm giving away the two carriers pictured above! There's more info on the giveaway below)


I also have a great companion tutorial to go along with the baby carrier. Introducing...


About two months ago I spied a woman in the grocery store with her 12 month old wearing one of these in the shopping cart. I stalked her for a few isles and finally decided I better get a closer look at that thing. It looked like something she made herself but she looked at me like I was smoking crack when I suggested such a thing. I sometimes forget that not everyone sews. I wanted to know where such a magical thing could be purchased. Confused we both looked for a tag. Couldn't find one but who cares 'cause ya know what? I can sew beotch! So here's the scoop.

"This baby harness can be used as a more reliable safety belt in shopping carts. It is also great for use in restaurant high chairs or when no high chair is available you can use it on a regular chair. It also converts to a leash for those times that your little one is just itching to make a run for it." 


So that's the lingo I used for the pattern because you never know who will download this pattern in the future and they may not really get my humor (or lack of).

Here are the links to the downloads for the instructions and the pattern pieces (please let me know if these links don''t work. I'm trying something new).

I hope you enjoy both of my new designs. They took a lot of work to perfect, which drove me crazy, but you benefit from the craziness. My very first giveaway! You can win one of the two carriers pictured on the Pea Pod Carrier pattern cover. Next week I'll be doing a giveaway on the Handy Harness.

Two chances per person... First, just leave me a comment.  Say "Hi", leave me a personal comment, or let me know something about you! The second way to enter is to become a follower. Just leave a comment letting me know you are following. If you are already a follower just leave a comment telling me that you already follow. If you mess up an want to change any of your comments just delete the first and leave a new one. Easy peasy. The giveaway ends on Sunday, October 17th (my half birthday, yes I used to celebrate this when I was younger), at 9 p.m. p.s.t.  Open to the entire World!


For those of you that don't win or just like instant gratification I have some of these beauties available in my shop. Lucky you.


Most of all, thank you for your continued support. I'm so glad to have you guys come and visit my little piece of the web.

4.05.2010

Thread Rack: The Non-tutorial Tutorial

Remember this from last week? Well I got out the hammer and glue gun and voila!
A thread rack

The basics:

  • thumb tacks (plain/flat if covering with buttons)
  • buttons (or anything you can think of!)
  • elastic thread (jewelry elastic, not shirring elastic)
  • bamboo cutlery holder
  • hot glue
Pretty much no explanation necessary on the how-to, but if you're going to try this, the one thing I would have done differently is to put the thumbtacks in only 1/3 rd of the way up on each row. The elastic doesn't need to be in the middle of each row. It would be easier to get thread spools in and out if it was lower. I'm also going to add a picture hanger to the back so I can hang it on the wall. This is nice and low profile unlike a lot of commercially bought thread racks. I originally thought I would need two of these, but it holds over 75 spools (more if all are the skinny spools) which is way more than I thought it would. I almost used some decorative thumbtacks that I had with black elastic, but decided the buttons were cute for a sewing theme. You could glue pretty much any cute little do-dad to the thumbtack. Fabric covered buttons would be nice also. I got my bamboo cutlery holder at Target, but they have them at Bed, Bath and Beyond also (good if you've got one of their coupons). I'd love to see your interpretations of this little project, so if you make one link to me!


2.14.2010

Bleach Stencil Reverse Applique

  I thought I'd make one more entry for the LBB/Dharma Trading Challenge. For this Valentines shirt I thought I'd try out a new technique. Bleach stenciling! I was pretty skeptical about the whole process, but pleasantly surprised by the outcome. If you want to try this super simple technique follow me.
What you need...
  • Freezer paper
  • Xacto knife
  • Spray bottle
  • Bleach
  • Fabric to be stenciled
Print or draw design on paper side of freezer paper. I have 8 1/2 x 11" inkjet freezer paper that I run through my printer.  Cut out design with Xacto knife. Press shiny side of paper onto fabric to be stencilied.
Fill spray bottle with about a 50/50 mixture of bleach and water. I didn't try pure bleach. Maybe this would have made the bleaching go faster. I did have to wait quite a while before my fabric got to the color I wanted. I sprayed the paper until it was pretty wet. I think I let the bleach sit on there for about 20 minutes. When I started the process I thought it would all happen in minutes.

On a side note... don't wear your all time favorite, best fitting cargo pants while playing with bleach.
Once the fabric is lightened peel off the freezer paper and rinse the bleach from the fabric with cold water and a little soap. I read somewhere online that if some bleach stays on the fabric and dries the crystals will still be "active" and can transfer to other fabric. It was recommended to put the fabric in the dryer to remove these dried crystals. 
 Here's my little piece of finished fabric! The image turned out much crisper than I imagined. I thought the bleach would seep under the stencil and be very blurry (which I was ok with too). 

Next is the reverse applique. I've never done this before and I was too lazy to look up a "how to" from my good friend Google, so if my technique seems backward it probably is. I cut out a heart template and traced it where I wanted the applique.
Then turn the shirt inside out and pin the applique fabric with right side to the inside of shirt.
Turn shirt right side out and top stitch (I used zig-zag) around template.
 
 Cut out image. You're done!
 For the shirt pattern I used Lil Blue Boo Sienna Dress pattern which I've been making a ton of lately. All three kids have them!


2.09.2010

Reversible Train Table/Play Table Tutorial

Keeping with the theme of "Celebrate the Boy" month I decided to show you all how to make a great addition to any boys playroom. A while back I made this great reversible play table for Rocco. I decided to post some of the how-to basics because it's really pretty easy to make with some simple power tool knowledge (or not! hand saw can be used too). Not only was it easy to make, but it cost under $50 (not counting the Thomas the Train playboard). You can make it even cheaper if you use wood blocks instead of bun feet.
After talking to my dad about possibly building a train table, he suggested I make one low to the ground because Rocco likes to play on the floor. I found this one but didn't much like the look.

I had some clear ideas of what I wanted. One of things I love about going to toy stores with train tables set up is that the tracks are glued into place and always ready to play. I also wanted to have a flat surface for playing with cars and building blocks so I needed to make the table top reversible. 

Here is a list of supplies and tools to complete the project.
  • 16' 3/4" x 5 1/2" pine (I believe they call this 1x6). Use the cheap stuff unless you plan on staining it. Once painted you'll never see the knots or grain.
  • 16' 1" x 3/4" pine for inside rail that holds the play board in place
  • 4 bun feet (or blocks of wood)
  • Wood Screws
  • baseboard nails
  • 4 dowels if using flat bottom bun feet
  • Four cabinet handles with matching nuts and bolts (see photo below). Handles are for turning the playboard over.
  • 1' of 1 1/2" x 1 1/2" pine
  • Chop saw (can use a hand saw)
  • Drill
  • Sandpaper
  • Wood Glue
  • Paint
  • Inside Varnish
  • Wood Putty
  • Train table playboard or plywood (if using plywood table top you can make the train table any size you want)
I didn't miter the corners because I was going to paint my table and I knew it wouldn't show. If you are planning on staining it you may want to miter the corners (which is above my skill level!).

  1. Cut your 1x6 into four pieces to create a rectangle (just larger than the playboard). I used a chop saw, but you could hand cut these pieces too.
  2. Nail from outside at each corner with two nails to create a rectangle. Apply wood glue to seams first. These nails are to hold the wood in rectangle until later steps where screws are attached for strength.
  3. Cut 1"x3/4" wood to create inner rail. Glue and screw into place. Screws should be about 8-10" apart along rail. 
  4. Cut four equal pieces from the 1 1/2"x1 1/2" wood to fit under the rail wood but not to extend past the bottom of the train table. This wood will not show from the outside and is there to attach the bun feet.
  5. Apply wood glue to these blocks and screw from outside corners of table countersinking screws. I didn't have wood screws handy so I used drywall screws. If you want something that can fit under the bed like a trundle you can stop here and go to step #8.
  6. Flip table over and make marks for bun feet placement. If you have feet that screw in you just screw them into the bottom of the wood blocks at inner corner of train table. The bun feet I use (about $6.00 each) are flat so I find the center of the feet and table bottom by marking an "X".
7.  Drill holes to match dowel width in center of "X" of both the table and the feet. Apply wood glue. Weigh down with something heavy while glue is drying to get the best bond. I used heavy books.
 8.  Fill countersunk wood screw holes with putty.
9.   Sand edges of entire table and over areas with wood putty (once dried).
10.   Paint entire train table. I used the same paint to match Rocco's nightstand, toy trunk and bookshelf. I love this brand because it has great colors and goes on smooth.  It's not in any stores local to me so I order it online.
10. You can leave it like this or varnish. I like the coat of varnish because my kids are rough on their things. 
I haven't added my handles yet. I found these at my local hardware store and bought nuts and bolts to match hole size. I will drill four holes on one side of the train table playboard and attach one handle to each side (sandwiching wood in between) so it is easier to flip the board. I was waiting until I glued the train tracks in place.

Note: Once I found a configuration the kids liked for the train tracks I glued the wood train tracks in place with Aleen's Tacky Glue instead of wood glue because of it's tackiness. Since the table is only about 10" high there are parts of the track that would not fit when the board is turned over. Those pieces (and large buildings like the roundhouse) I did not glue in place. We just remove these prior to flipping the board around. Also remember not to place the tracks to close to the edge or they will interfere with the inner railing of playtable.
 
Here is the playboard leaning against Rocco's bed minus some of the large buildings and tall bridges. This is the track layout I used.


On the flip side of the playboard I found a felt mat used for playing with toy cars. It has roads and building printed on it. I had to cut it down a bit to fit and I used spray adhesive to attach it to the wood. Some Thomas the Train playboards are two sided, but mine was just plain wood on the other side.

You can get creative with this idea of a play table. If your child is not into trains and cars you can paint one side of a piece of plywood with chalkboard paint and the other side with dry erase paint! Let me know what creative ideas you come up with!


Related Posts Plugin for WordPress, Blogger...